This past weekend we went to the North Shore and watched our friends play in Summer Music Festival. It was put on by a family (of 11 kids), so musically talented, it blows you away to watch them. Most of the kids in the family play a wide variety of instruments, and when I say "play" I mean at a Master's level. Most songs are improvised and it's not uncommon for the kids to switch instruments with each other throughout the performances. If you want to be blown away....or transported to another world, spend some time on their website
RonArtis.com . Not only are they musically talented, but in the visual arts as well.
They are a homeschooling family, so talented and free, and they love God so much they are amazing to be around. While we were sitting there I asked a friend, "How in the world do you raise kids like this?" her answer inspired me. She said simply, "
Our children are us. They will be what we are." I could go on and on about both the intellectual as well as the spiritual implications of her insight. How they have impacted me this week. But there was one way that I was really inspired.
See, I am actually an education major....an
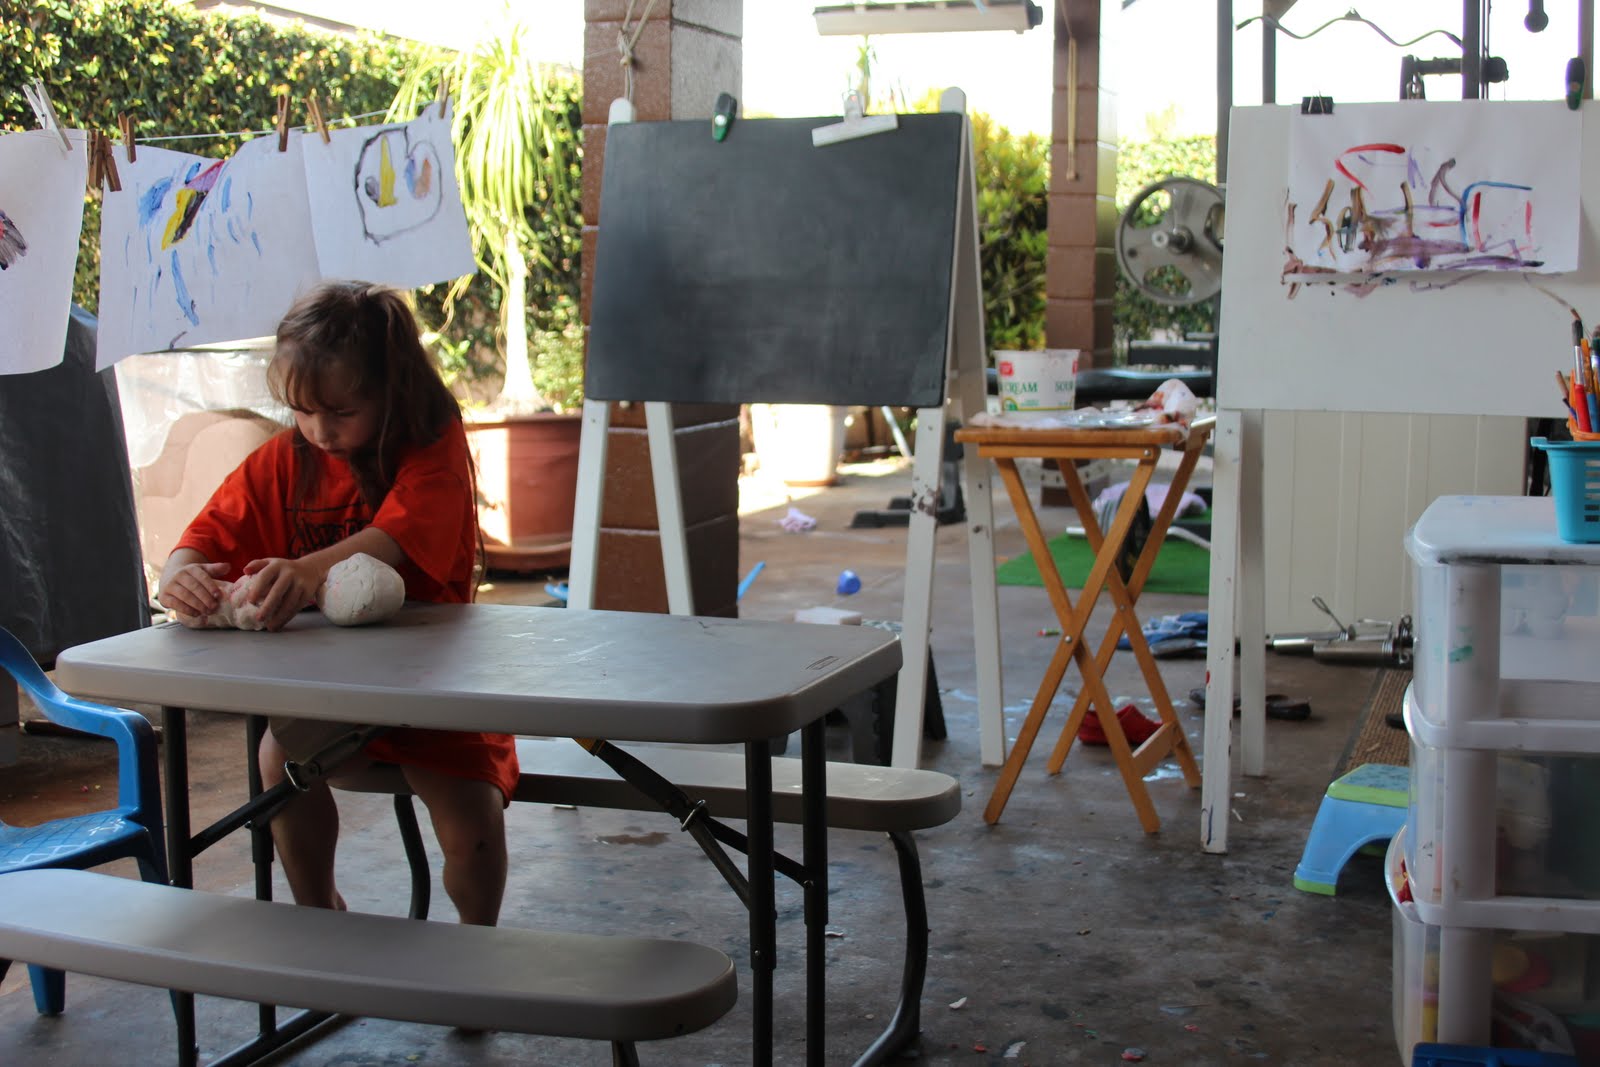
art education major. It's been so long thought since I've felt this creative, artistic urge. And recently I've wanted to show that side of me to my own kids, awaken those abilities in them and give them some freedom to find their own creativity and gifts. So this week I started by setting up an Art Studio for them. A place where they can go whenever they want, paint, sculpt (play with play dough), create! Now I realize with some freedom with art supplies there also comes mess. But I'm learning and training them to care for the space themselves, give them the tools to not only have the supplies at their disposal but clean up as well. Over all I think it's gone fairly well this week. I know they have enjoyed the area, they've spent about 4 hours each day in the space. It has been amazing to watch them outside painting and creating.
Here is a peek at their Art Escape......
 |
| A simple little space with everything you need to create! |
I am blessed with an outside covered lanai (patio), and yes we do live in a warm climate year round, so it makes it easy to mess up and clean up. (I'll share more later on indoor art areas). I was given 2 easels for art and simply added clips to hold the kids art work. A TV tray table sits in the middle to hold water, brushes and art media (paint, oil pastels, etc). All of the kids Art supplies are located in the plastic drawers on the right. We use a small camping picnic table for the kids that cleans up perfectly with a little help from a magic eraser! And I hung a rope from one post to the house, added some clothes line clips for wet paint.
 |
| Painting smocks and shirts, brushes and magic erasers! |
|
|
Of course we don't have rules for what you can create, but we do for using the work space! I tried to keep the rules short and sweet (although Jonah kept saying "Rule # 49596").
1. Put on a painting shirt or smock.
2. Gather your supplies.
3. Create!
4. Clean up!
As long as they clean up their area, I love the idea of the kids creating for hours on end!
 |
| Make sure the drying rope is low enough for the kids to hang themselves! | | |
|
 |
| Three drawers were enough to house paper, paints and clay! |
And we are ready to create!
So far the kids have really loved the space. I've been playing some classical music for them while they create. I hope to showcase what they have done in the future!
If you have an art space or are inspired, leave a comment and a link to your blog, I would love to check out your Art Escape!
I'll also be posting some ideas for indoor, less-mess art areas in the future, now go create something!